Audio Morpher is still in beta so you may find bugs, please let me know if you do so I can get them fixed.
Introduction
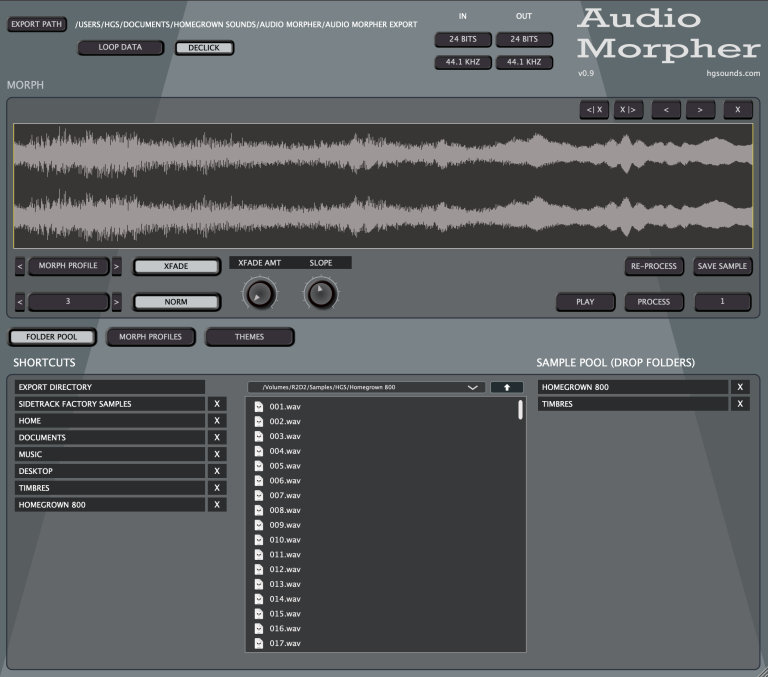
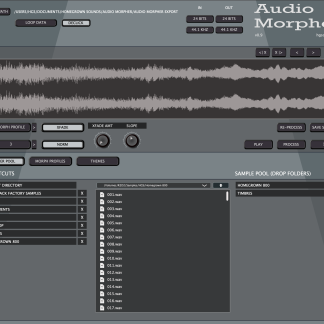
Audio Morpher is about using various ways of re-imagining existing samples into new ones. It is still in beta but getting very close to v1.0, there are few bits of tidying up & the theme system to fully integrate, but other than that it’s now feature complete. Note that is hasn’t been tested with much with very short samples and so until v1.0 it might be wise stick to larger Files.
It makes 2 types of useful files & uses relevant Meta Data to do so, the first is making seamless loops so they can be dropped into samples and will loop correctly for chromatic use. The second is creating sliced files which can be used by software that understands cue markers. it is built as companion to sidetrack with a focus on creating samples useful for it’s various playback modes, but outside of that is a unique application for generating content. It also supports Octatrack Sample chain export and along with manual mode makes it a simple Sample chain editor.
Processing Modes
There are some common parameters that may or not be used/visible depending on whether the mode uses them:
- XFADE/XFADE AMOUNT – This applies a cross fade so that the file will loop seamlessly. In order to do this an amount of Data must be sacrificed and so the larger the cross fade amount the larger this will be and the longer the cross fade.
- NORMALISE – This normalises the volume level both for the incoming files and the final output file.
- SIZE – Although slightly different uses by different profile it generally means that longe portions of the incoming WAV files will be used.
- SLOPE – Audio Morpher uses Linear Volume profiles to process the sound, however the Slope parameter allows changing the curves. A value of 1 represents Linear, less than one is convex, and greater than 1 is concave.
- MID POINT – For any Modes that use a simple Attack/Decay Envelope this sets the point as a percentage of the file where Attack becomes decay. So a setting of zero means no attack, full decay. Setting it 1.0 is a special mode that disables the volume shape completely so that the Raw data is used without any kind of volume modulation.
- NUMBER OF FILES – When this is available it selects how many WAV/AIF files will be used by the process.
- FIXED/VARIABLE – Most Modes have a Fixed and a Variable type, the Fixed modes use an identical size for each of the processed Audio slices/sections, whereas the Variable means they can be different sizes.
Re-Sample only
 This mode is for processing files that are already save and simply applies the input/output re-sample options an then saves to a new file in the export folder.
Morph profile
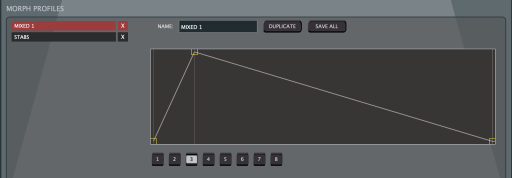
This mode uses a Morph Profile which is a total of 8 Volume Shapes similar to an ADSR Envelope. Each shape is applied to a random WAV and the results are then mixed together. The WAV Amount decides how many are used by the next process or RANDOM will use a random number of stages.
The WAVs used are selected randomly from the sample Pool & then cropped to the shortest of the selection so they are all the same size. The Volume Shapes are then applied and the WAVs are then mixed together. Although the profiles are linear, the slope parameter if less than 1 will make them concave & greater than 1 = convex.
The Profile editor allows creating as many profiles as you want, each has 8 shapes which can be viewed & edited by clicking on the number buttons. The profiles are listed on the left, can be renamed via the dit box & press Enter/Return, and the currently selected can be duplicated to a new Profile which will be added down the bottom. If there are more Profiles than can be displayed, a scroll bar will be added. To edit the shape drag the nodes.
Chain Fixed/Variable
This mode is uses an Attack/Decay Envelope to apply to each sample, they are then cross faded at the mid point to produce a morphing chain of WAVs.
Chain Hits
This mode mixes up to 4 Audio files per slice to create a unique ‘hit’ for each slice, think of it as a kit of one shot samples.
Cycles Fixed/Variable
This mode grabs small samples defined by the Cycle Size to use as single cycle oscillators, it then uses the size parameter to produces longer tones from them and the morphs these together to create a complex morph. Depending on the mid point setting it can either produce a flowing sound/seamless loop, however with the mid Point set to 0 it will produce stab type sounds suitable for saving as a chain. Setting the Mid Point to 1.0 will bypass the volume shape completely.
The Variable Option will use a different size for each slice for a non grid based output.
Cycle Chain
Anyone who has used sample chains on an Octatrack likely know that you can use each of the slices as a single cycle oscillator and then modulate the Index Id for interesting sequences. This mode is about creating chains for that scenario which Sidetrack also supports. Select the cycle size in samples, generally 512, 1024 etc… the amount of slices to use and that number of WAVs will be loaded and a random cycle pulled from each to create the chain.
Ring Modulator Fixed/Variable
These modes are similar to the Cycle Modes except the first cycle is used as a solid tone for the entire length and the subsequent tones are used to modulate the volume. Above this is using the variable version with Mid point set to 1.0 which disables the volume shaping to produce a selection of tones.
RM Chain
This is the same as Cycle Chain, for making sample chains/cue files with single cycle waveforms except it uses Ring Modulation to create the sound.
Manual Mode
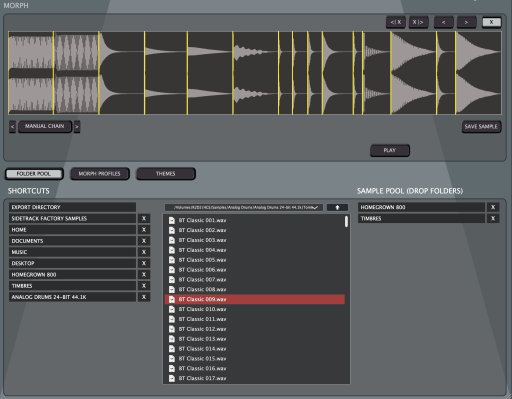
This mode allows manually building a chain of WAVs/AIF Files, either drop files or use the File Browser to add WAVs, using the top buttons you can remove from the from or back, shift left & right. Beyond being useful for making drum/sample kits for use in SideTrack it also serves as a simple Sample Chain builder for the Elektron Octatrack.
Quick Start
To use Audio Morpher:
- Drop Folders to the Sample Pool – You can drag from the internal browser or use Finder/Explorer.
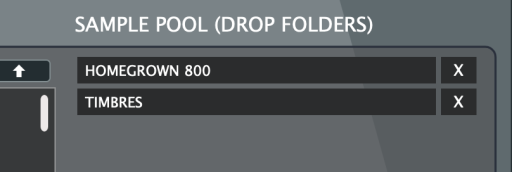
- Select Output Directory – This decides where files generated/processed by Audio Morpher will be saved. By default this is a folder in Audio Morpher’s documents/settings folder.

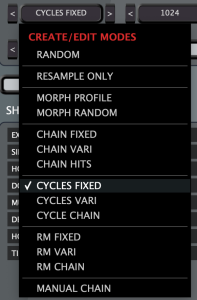 Select a Mode – There are quite a few different modes available which generate samples in different ways, see below. The parameters that the mode uses will be displayed on the left side of the Morph area.
- Select Input/Output Settings – All files are converted to the input samplerate & bit depth settings which can be ridiculously low for creating delicious Lo-fi effects, the files are then re-sampled to the output samplerate & bit depth ready for processing. When files are saved they will be saved at the selected output settings.
- Click Process – A wav will be generated using the settings. If the export amount is set to 1, the file will not be saved and if you wish to save it, click the save button. Files are auto numbered/named and save to the output directory. If more than 1 is selected, Batch Mode will be used and files will be processed and auto saved.

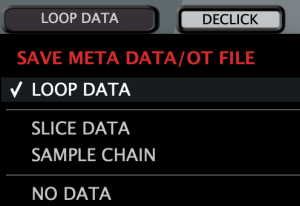 Meta Data – The Meta option at the top allows deciding which type of Meta will be saved with the WAV as well as which is currently displayed with the processed WAV. There are 2 types of Meta supported:
- the first is simple Loop markers for the whole file so that samplers/software that recognises them can auto loop the files.
- The second type is CUE Markers, which divides up the file into slices. This is read by software such as Sound Forge & Wavelab, as well as SideTrack & Kit Creator. In SideTrack these are used by the Slice Modes in various ways. In Kit Creator these can be converted to any of the Output Formats. Octatrack Sample Chain Export is also supported which also exports an ‘.ot’ file.
Sample Organiser
It may not be immediately apparent but Audio Morpher contains a simple but useful feature for quickly/previewing organising a folder of samples via keyboard shortcuts. Browser to a folder containing WAVs/AIF using the inbuilt browser and select a WAV. It will load immediately and if Play is engaged immediately start playback. hot the Space bar to play if not. You now have the following options:
- MOVE TO SUB FOLDER – Using the number keys 1-9 will instantly move the Audio File to a sub folder named after that number, if the folder doesn’t already exist it will be created.
- DELETE – The Delete key will send the file to the Trash/Recycle Bin.
After one of these actions has been taken, the next file will load immediately and play (assuming Play is on) ready for the next action. This is useful for tasks like sorting Drum Samples into types for example.




Reviews
There are no reviews yet.